Controlling the Vocabulary
For additional context, we put some notes on this process and its goal at the end of the Overview page.
You and your class will be creating a controlled vocabulary to enable discovery and browsing across your collection. This feature will be enabled by your creation of a filters.csv file that lists the short “tag” and description of each category you’d like to feature.
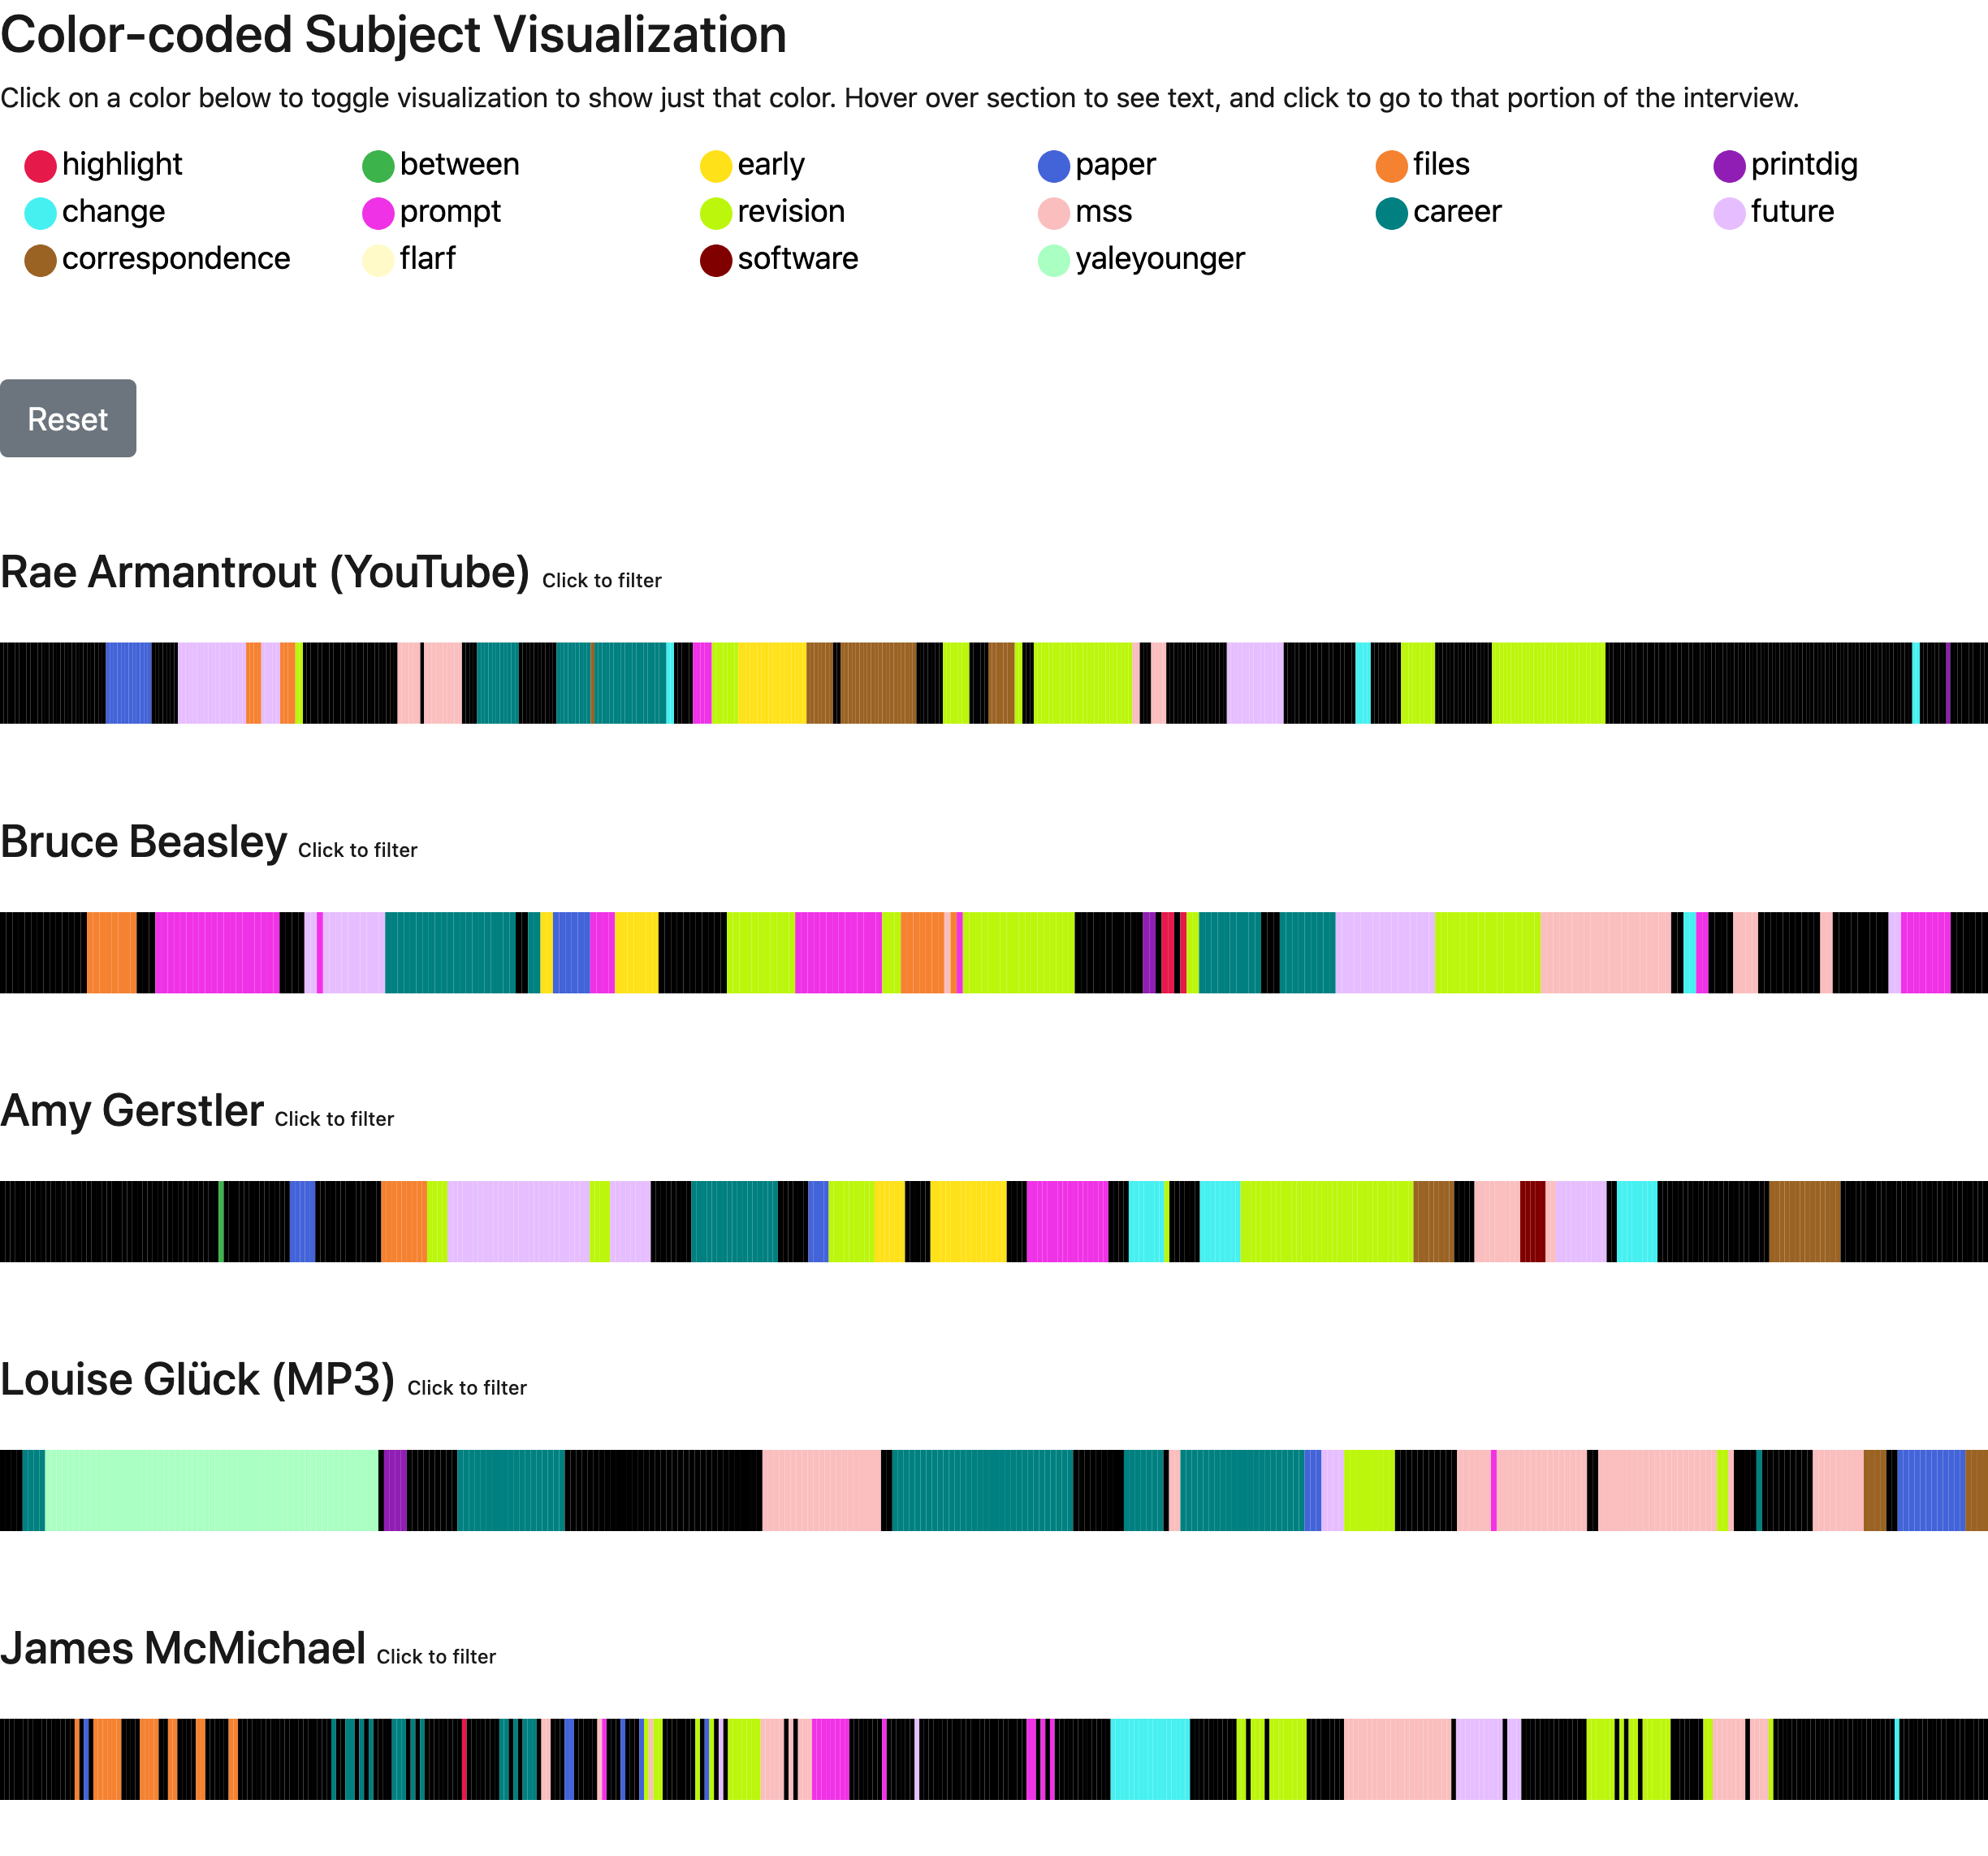
The filters.csv file will communicate with the tags you enter into the the tags field of your transcript’s CSV to create the tool’s color-coded visualizations (seen below).

TIP–> It will likely help your students coding efforts if you’re able to define the majority of the subject codes before they get started coding their transcripts. This can be done solely by the instructor, or via a group activity.
Regardless of your approach, you will need to edit the filters.csv file found in the _data direction. You can go about this one of two ways:
Editing a filters.csv using Google Sheets
Instructors in the past have had success creating a shared spreadsheet that they work on with their students. To do this:
- Copy this blank filters.csv spreadsheet template by clicking the link here.
- Then click the “Make a copy” button in the middle of the page.
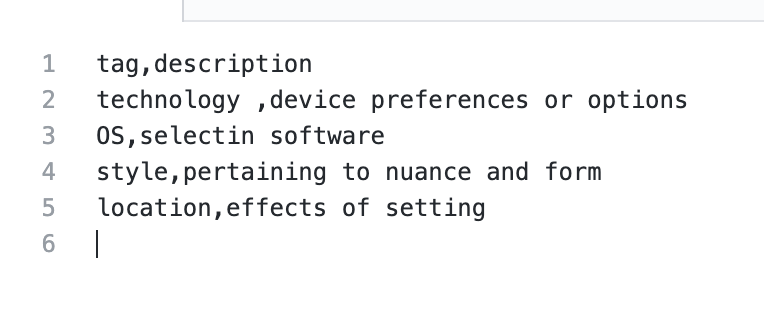
- In the “tag” column write out the tags you wish to include in the transcript.
- In the “description” column write out a brief description of that tag.
- When you’re finished create a new .csv by clicking on the “file” icon, hovering above “download”, and selecting “comma-separated values”.
- Rename this file:
filters.csvand upload it into your GitHub repository’s_datafolder. (Instructions in our next step.)- Note that you will want to continue to edit this file as you add more transcripts and more codes
See a finished filters.csv file: You can check out what a finished transcript looks like in this Sample Google Sheet
Editing a filters.csv directly on GitHub
- Open the _data folder
- Open the
filters.csvfile - The top line is the header line that defines the fields. DO NOT EDIT OR DELETE THIS LINE!!!
- Look at how the short “tags” are connected with slightly longer “descriptions”
- Replace the current tags and descriptions with a few of your own.
- Commit the change at the bottom of the page by clicking the commit button (be sure to write a commit message so you can track your changes)
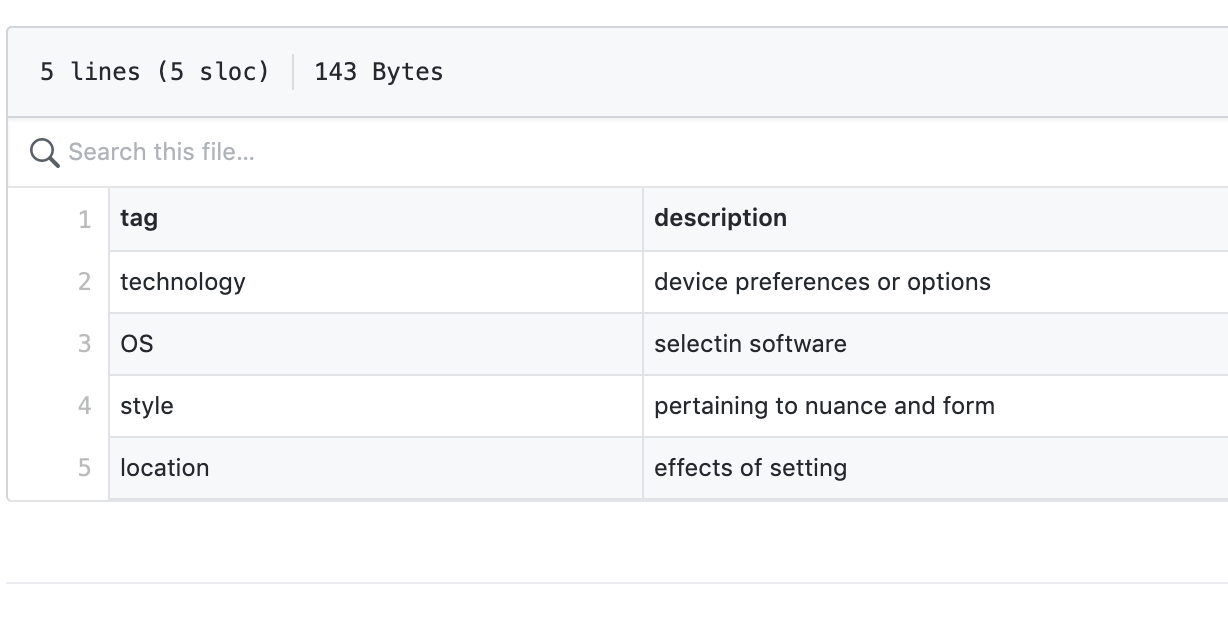
- However you edited it, the finished CSV should look like the example below (with your new tags and descriptions) in GitHub
As you develop your site and your students add subjects to their own transcripts, you can continue to edit this document.
Below is a slightly more robust example of what your visualization will look like when the project is complete.